
Rusted floors
In the beginning, I just planned to change the carpets in the front places. But at the end, this article is definitely in the "Body" category...
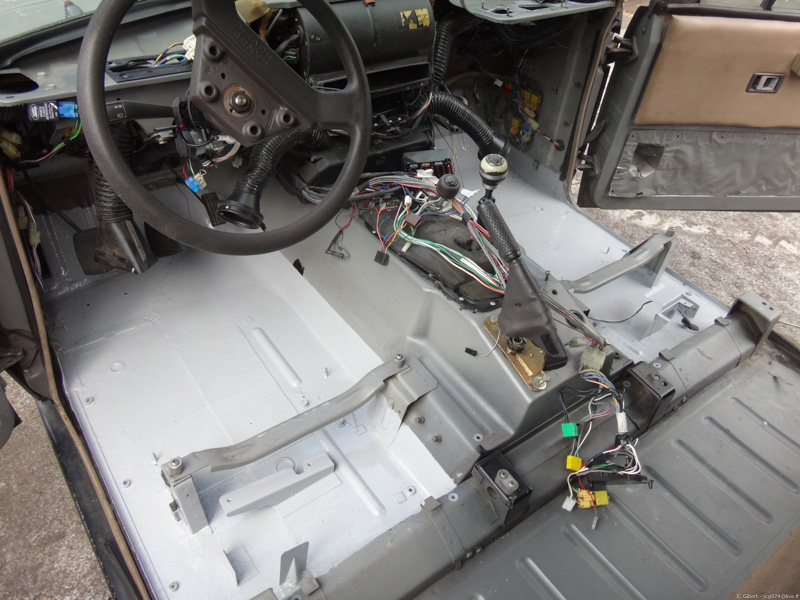
Under the carpet, I found the thick black foam carpet. It was very damaged, especially on the driver's side. It consists of a very dense foam about 20mm thick covered with a 3mm rubber layer. The latter felt apart and the foam underneath was very "packed" where the driver's feet were laid.
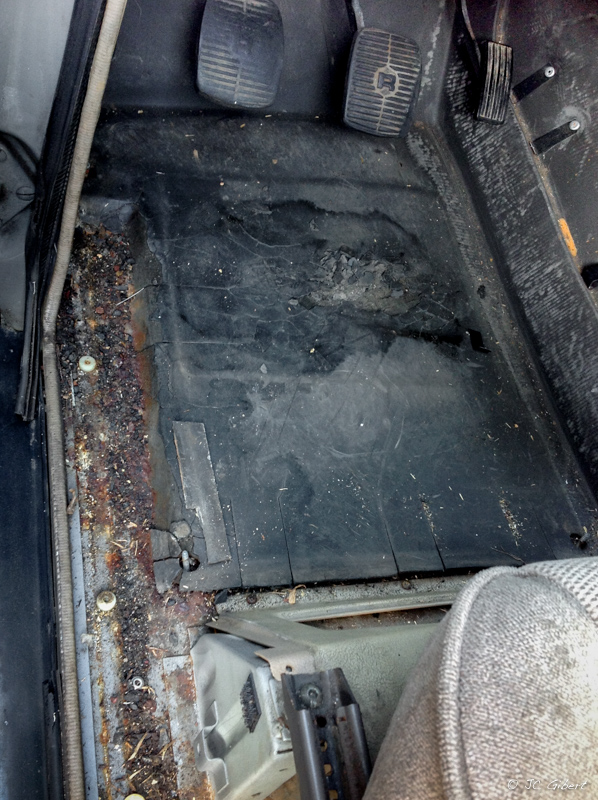
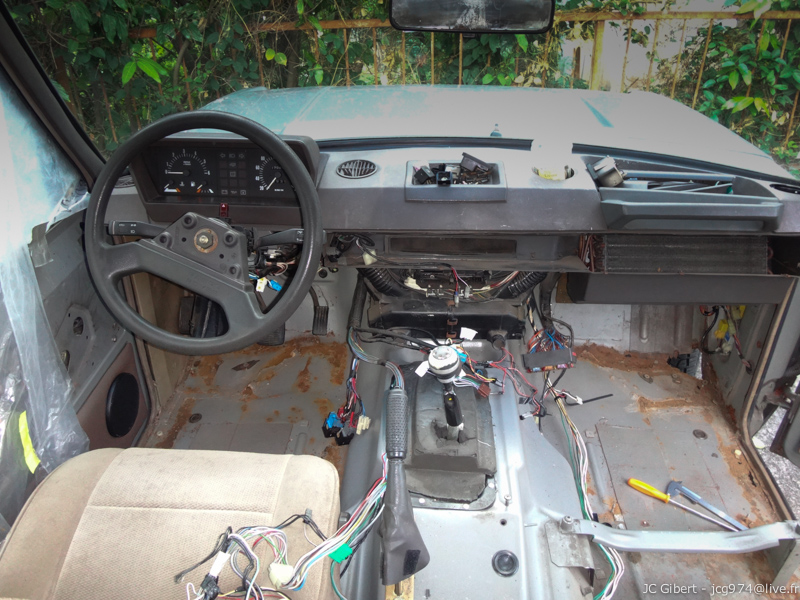
But the very bad thing came when I looked under this foam. I was stunned to discover a lot of moisture and especially rust in large quantity. It was such a disaster that I had no other choice to remove completely this foam carpet (one piece for the two front seats, which required removing in addition to the central console already disassembled, the lower part of the dashboard).
And this was the result :
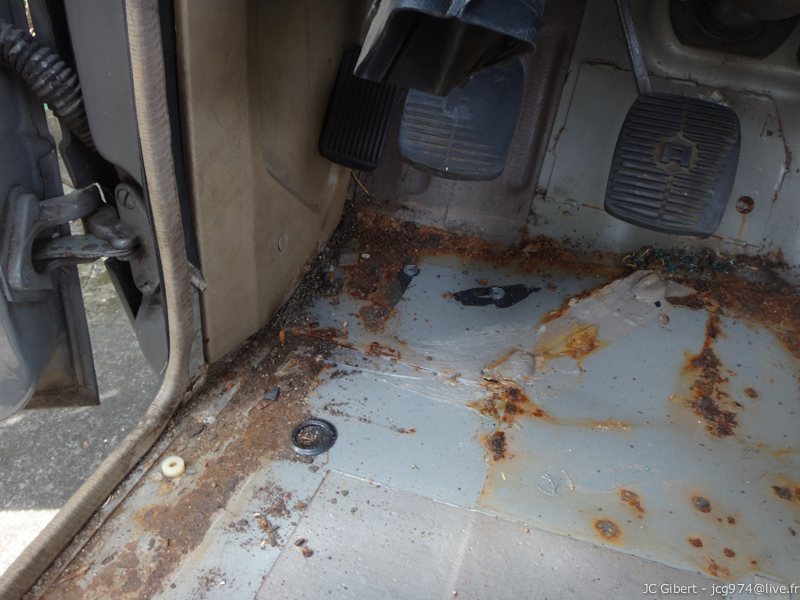
Driver's side was rusty, but ultimately, it was rather superficial. After scraping with a wire brush, I found that the metal was not too deeply corroded.
A good rust remover treatment and adequate paint could be enough.
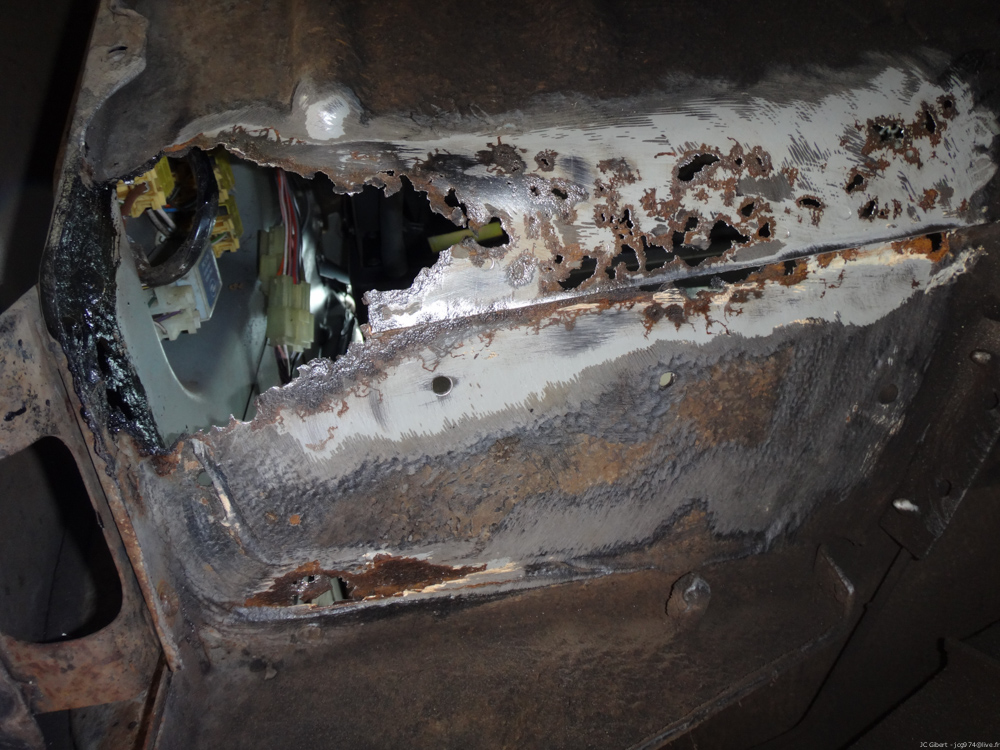
But in the passenger's side, it was a real disaster. There was a big hole through which you can see the wheel :
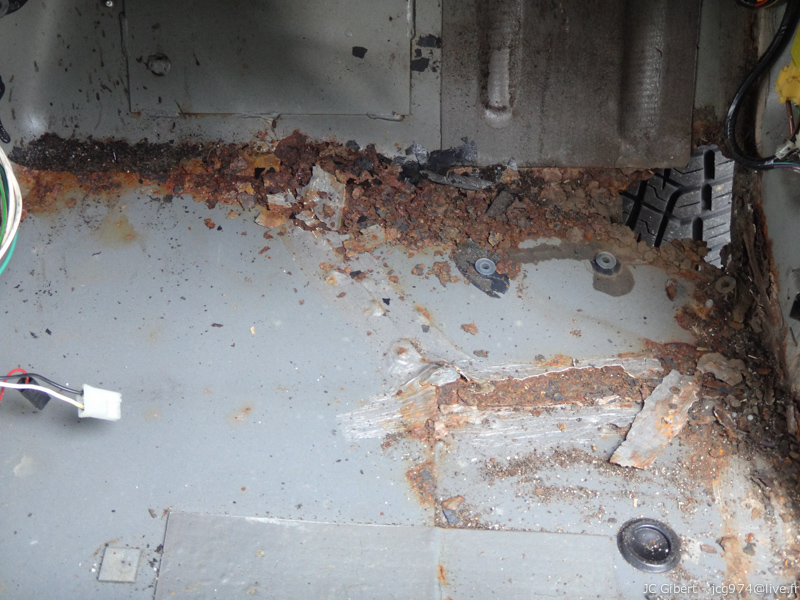
It was way beyond my skill level. I had to call someone to help.
A friend of mine advised me a small garage that would weld bodywork. I called them and a young woman told me that she will come tomorrow to see what's is the work to do.
"Tomorrow" was some weeks from now and of course nobody came. I was not really surprised anyway.
But from this moment I understood that I could count on nobody but myself, so I had two main options :
1. Get into welder. Buy a small MIG welding machine, metal sheets, a grinder to cut rusted portions, etc
2. Make a repair with composite materials, resins + fiberglass, polyester putty...
After seriously considering the two options, I eliminated the first solution because, besides the needed financial investment, I was not sure to be able to acquire the knowledge for the realization of a clean work.
So, after cleaning the rusted areas, that was what it looked like (black surfaces is a V33 anti-rust as first treatment)
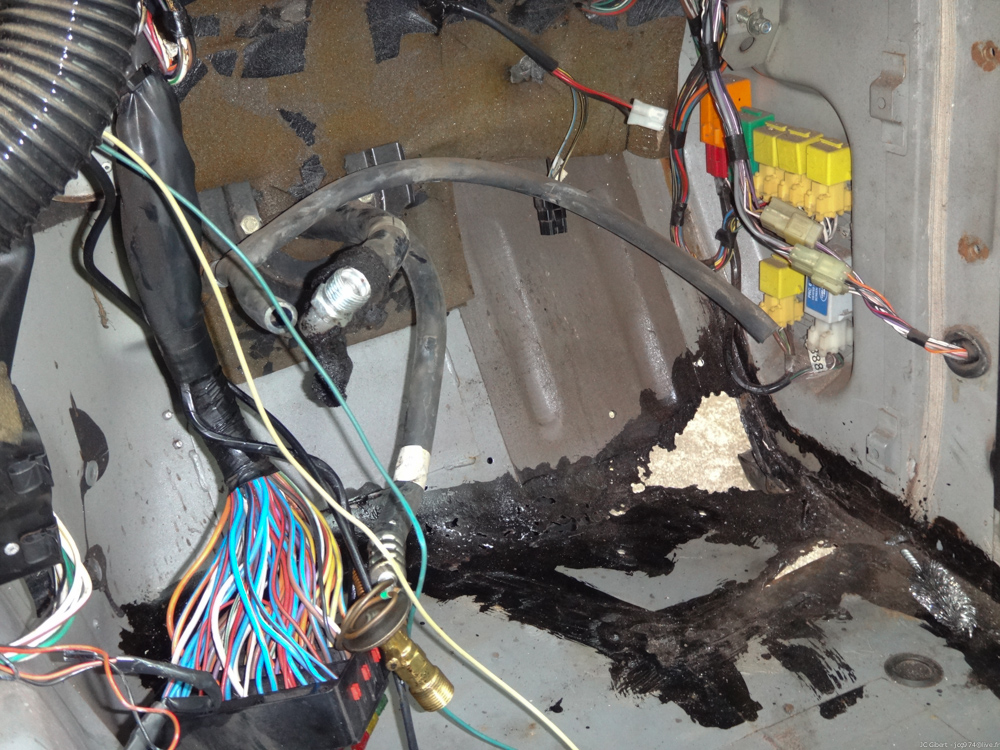
Note that I also disassembled the fans block as well as the air conditioning radiator (but this should be another blog's article).
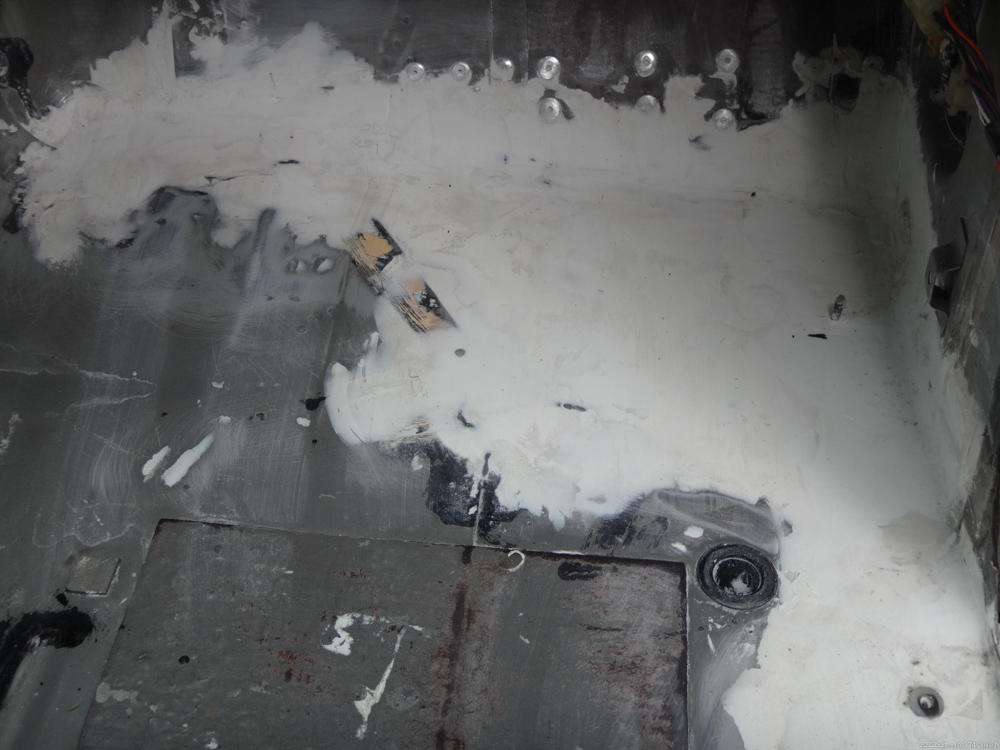
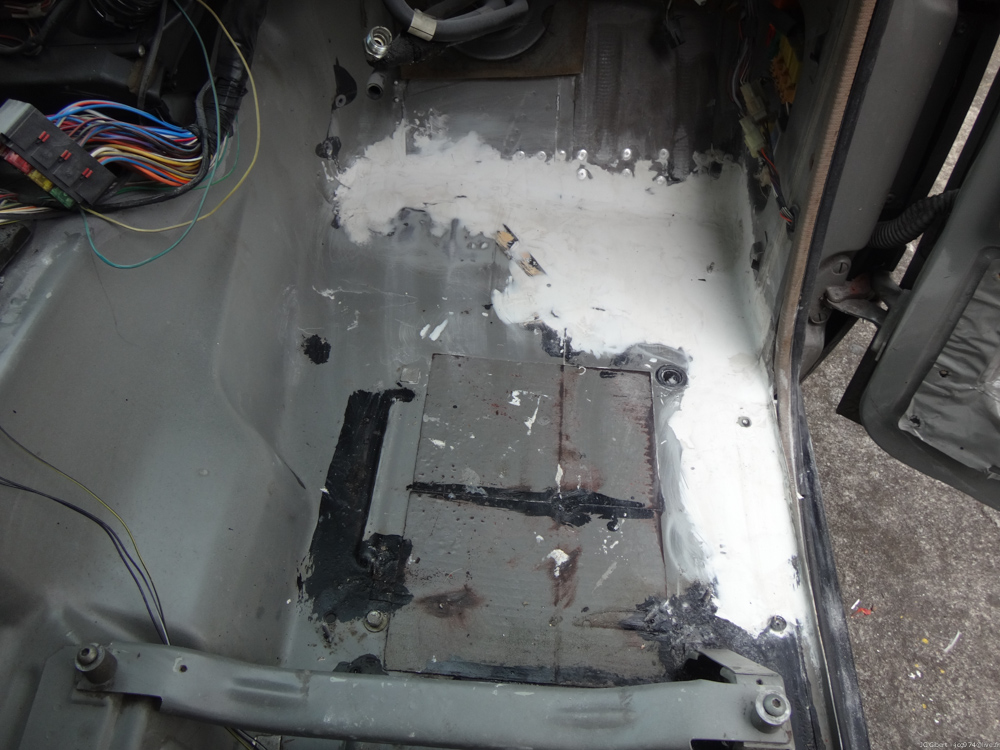
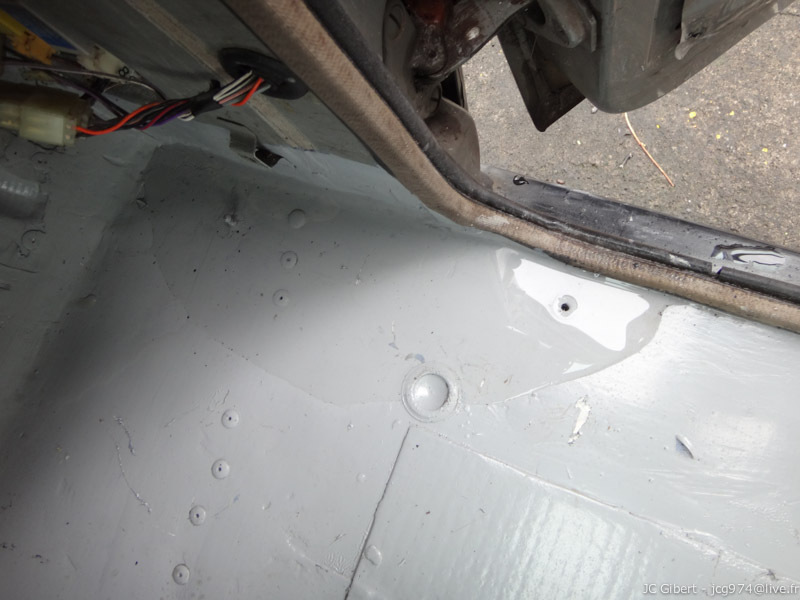
Passenger'floor (view form inside) :
and seen from below :
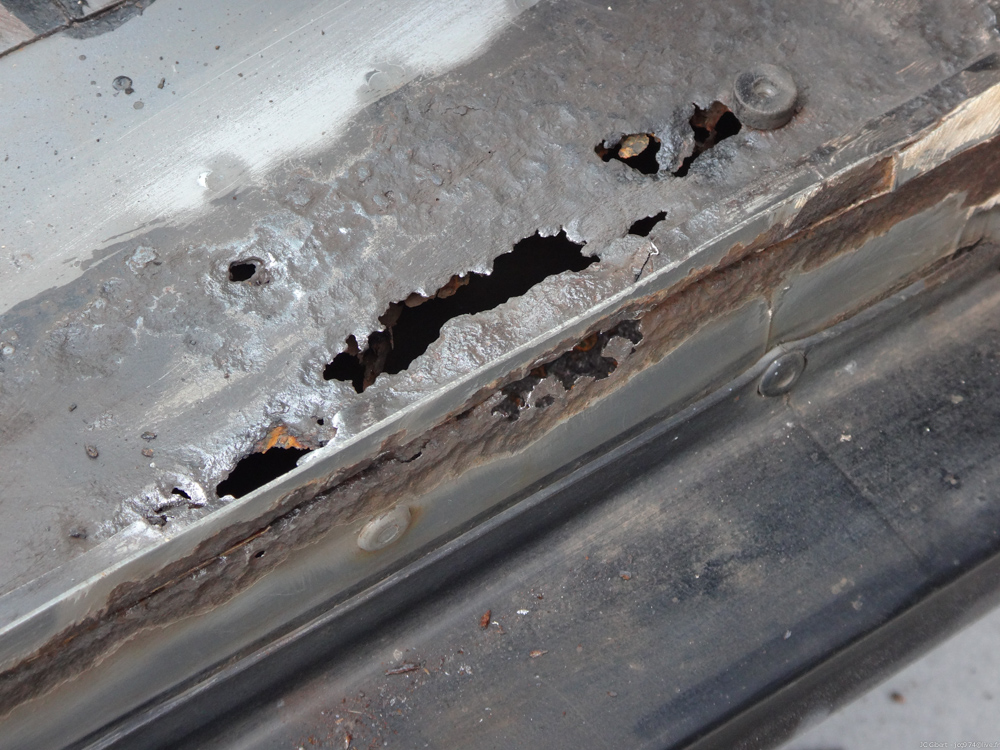
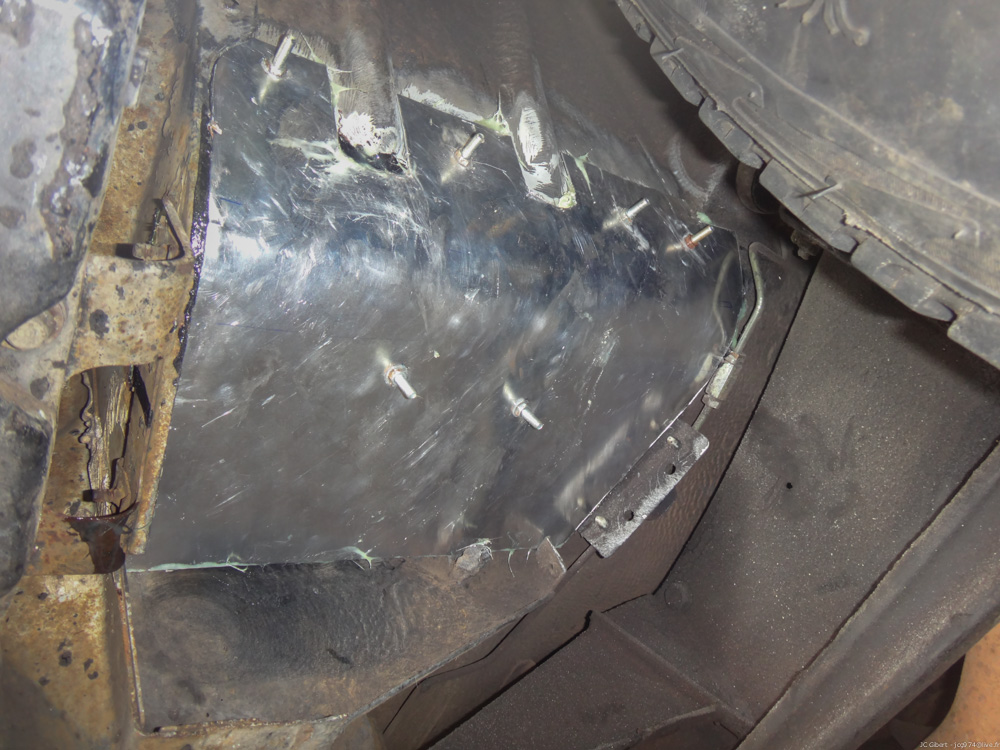
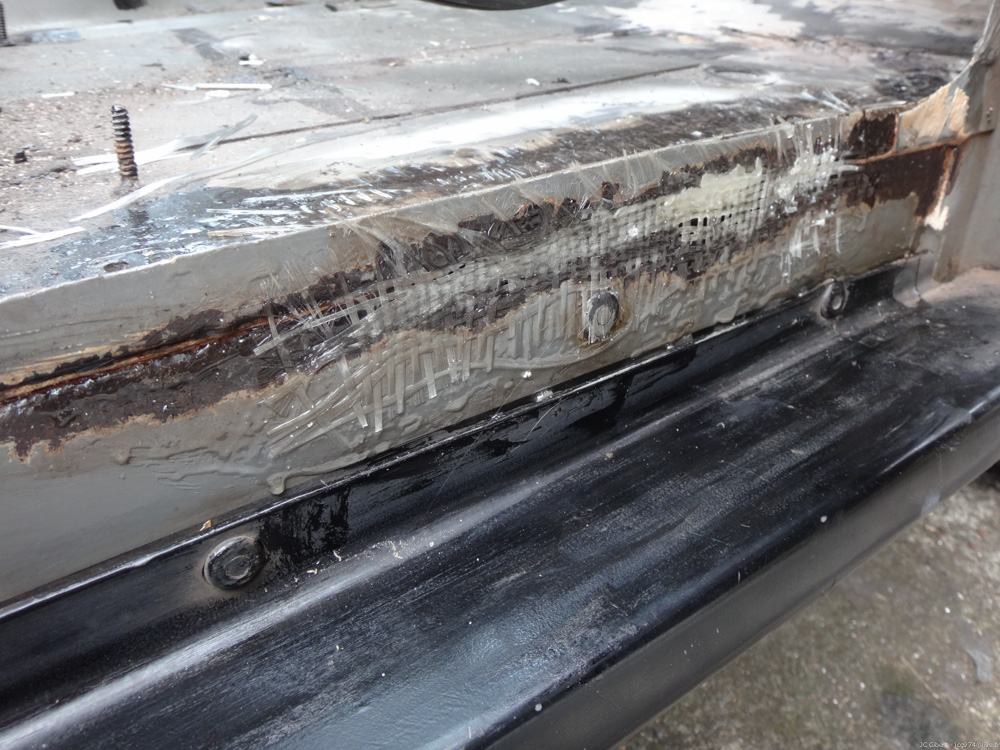
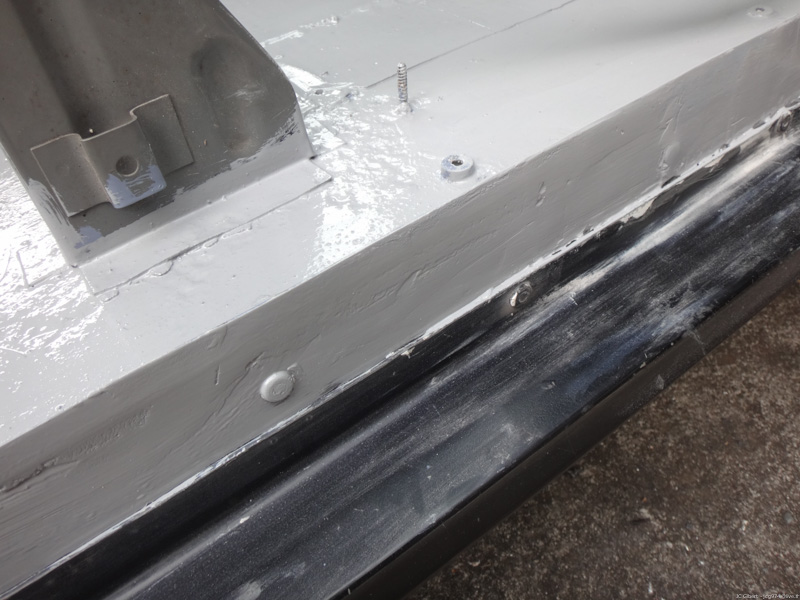
Passenger's floor along the door (from inside) :

and outside view :
First thing, I put under the body a thin sheet of aluminium. This plate was not intended to replace a sheet of steel, but only to sandwich an armed polyester putty (armes Syntofer) :
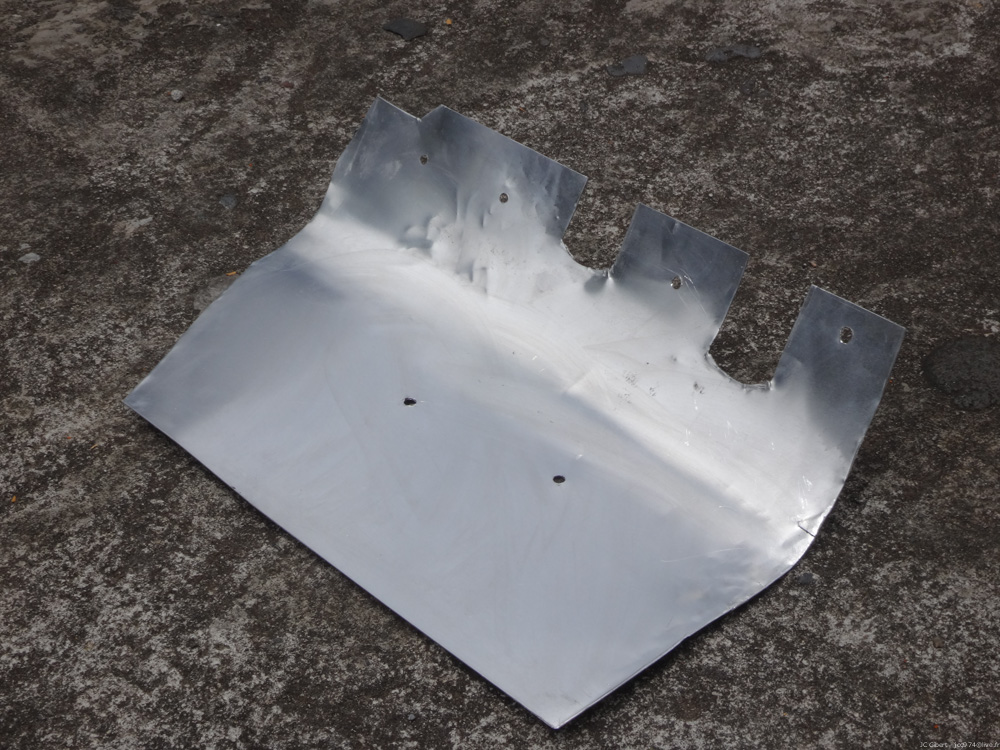
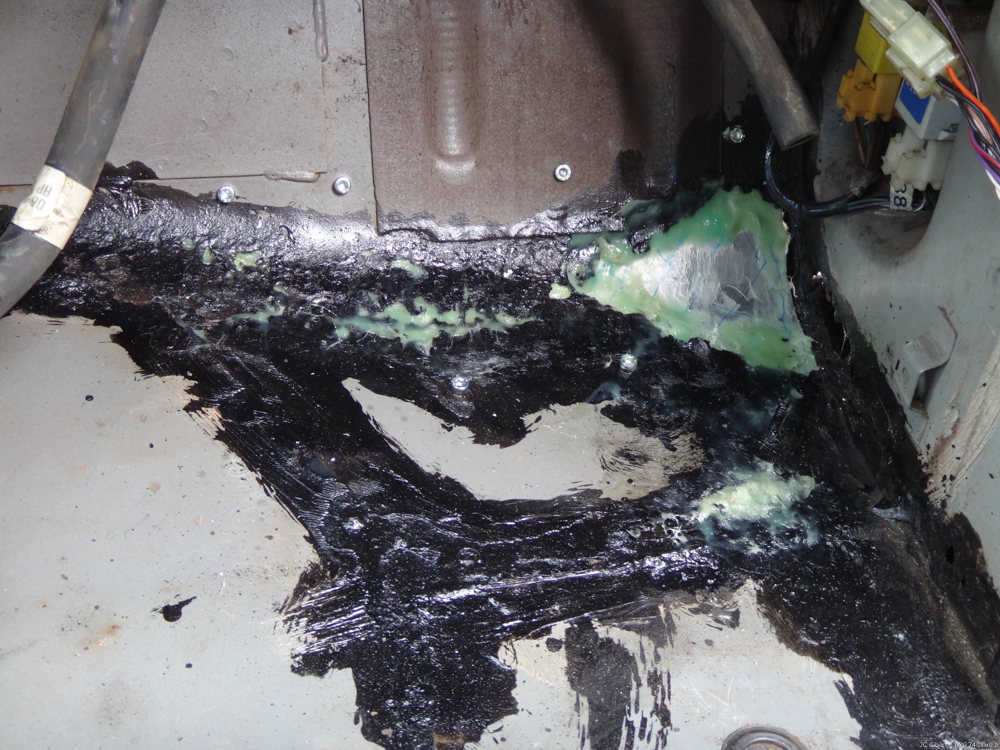
Laying the plate. As the polyester is very fast-setting, the first fixation was made whith temporary bolts, which will later be replaced by pop rivets.
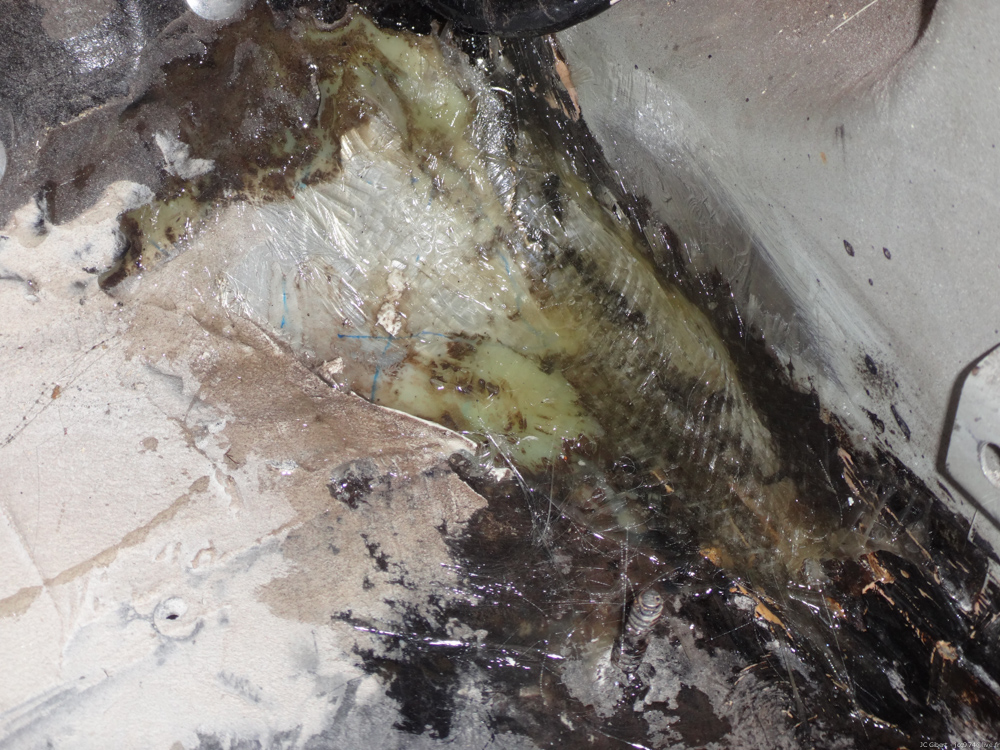
From the inside, we now see the plate itself, but also in green the mastic that consolidates the whole thing.
Second step, laying of resin and fiberglass to seal the remaning holes :
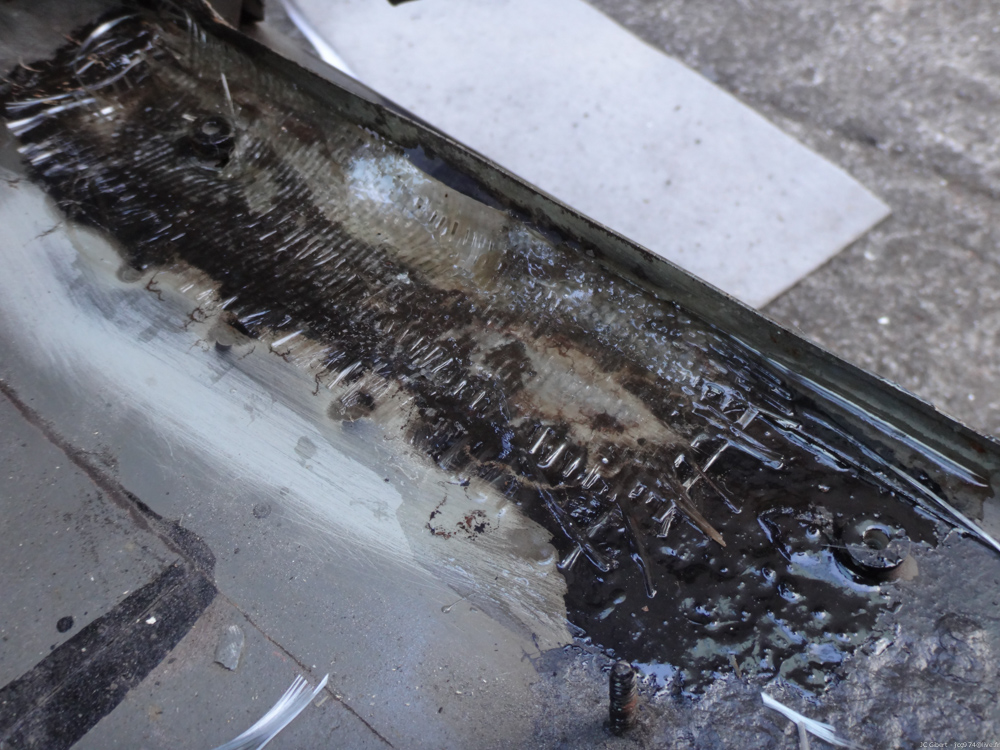
Next step, laying an unreinforced polyester putty (Synfofer) that will be sanded and polished (several passes)
After several layers (putty, sanding, putty, sanding...) to reach and acceptable result, I could finally put the first coat of paint.
I really didn't like the color (the sticker says "grey", but for me it looks more like "blue").
I finally found a "grey" , to bright, but as least, it's "grey"...

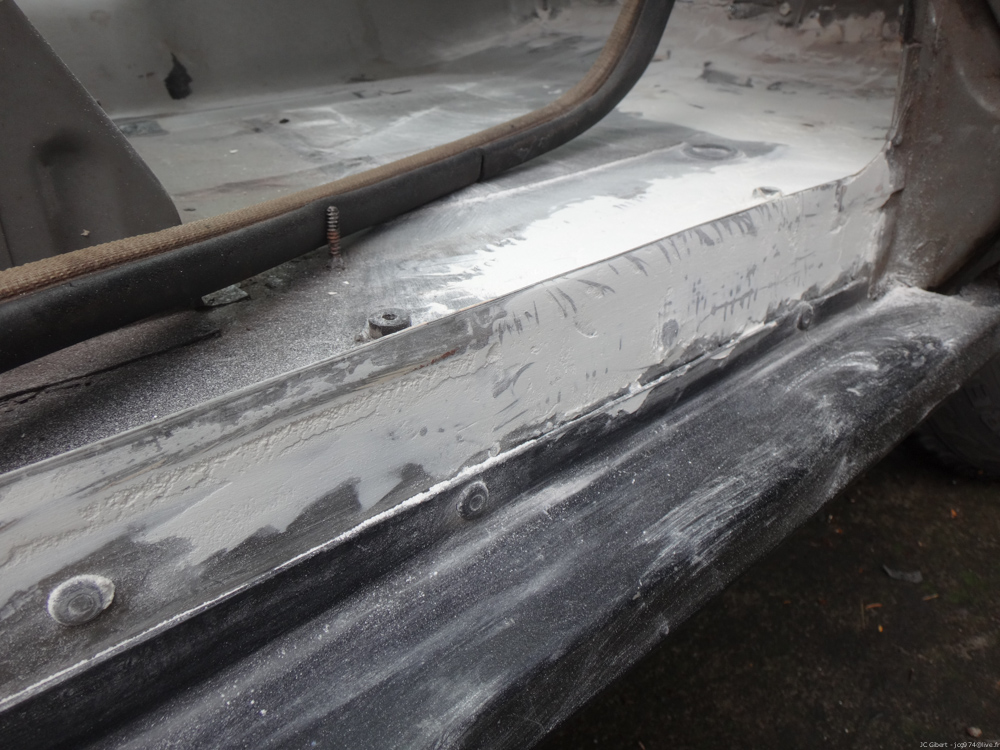
Well after that, the result looked much better than what I found after removing the foam and rubber mat.
Outside of the passenger's side, it was far from perfect, but at least it's consolidated, and it seems resistant and strong enough.
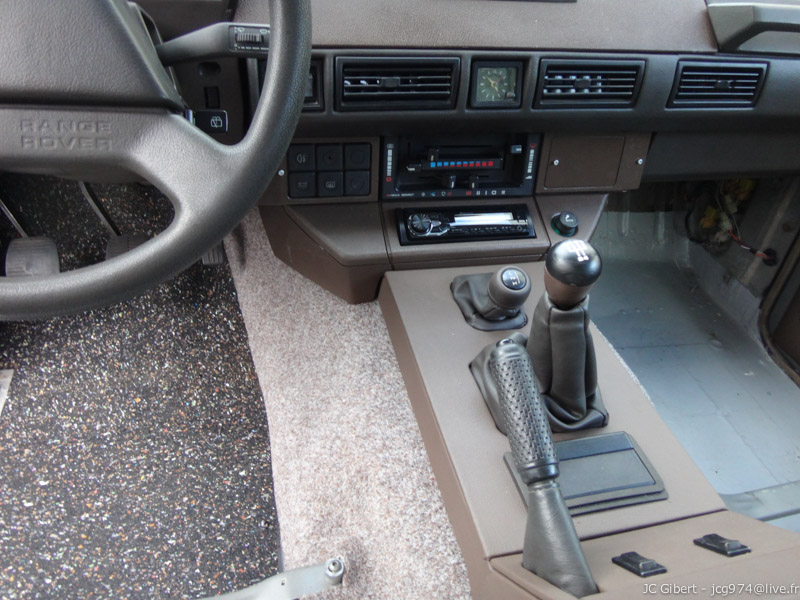
Some time later, the center console and the cubby box (both totally broken and rebuilt, see articles about them) have been raised and dressed with a new carpet. It was time now to find something to replace the foam and rubber mat on the floor.
As it's too often the case, there was no way to get original parts (anyway I did'nt find anything on the multiple Range online shops)
I had to find an alternative solution. I thought of compacted rubber plates that are sold to placed under washing machines.
Pros : Thick (10mm, possibly I'll put two layers), cheap, easy to find, easy to cut.
I made one on the driver's side, just to see what it looks like :
Not so bad actually.
But a bad surprise happened at the same time.
Indeed, after a heavy rain, I discover a true pool on the passenger's floor.
WHERE DOES ALL THIS WATER COME FROM ?
I couldn't manage to find where it came from. So I put talc powder all around the flooded area and waited for the next rain.
I didn't have to wait too long and the result was that it didn't come by the door (as I thought because the door rubber seal was old and partially missing). Obviously, it came from the front of the car, the leak should be under the decker panel just in front of the windscreen.
And in the mean time I understood why the floor was so rusted. A lot of water came without being seen and stay under the mat (no possibility of flow or drying), corroding the floor until drilling holes.
Ok, So I will have to look under the decker panel, but it will be in another article.